 |
The Story of the Stick

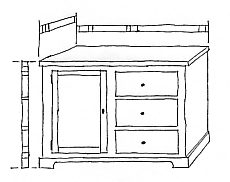
In this day of computer programs, the method of using a simple stick to design complex objects is a surprisingly practical one. Stonemasons have also used it for centuries, and it probably has its roots in ancient Egypt. It goes by many names; story pole, story rod, or story stick, but they all mean the same thing; scribe some marks across a stick’s width to represent an objects size and characteristics in a certain plane- height, width or depth, and build an exact form from those witness marks.
To grasp it’s simple principle of use think of the resulting marks as representing a piece of furniture compressed into a one-dimensional plane of view. Since a three-dimensional object has height, width, and depth, each plane can be examined and represented in complete detail using just three surfaces of one stick. Although the method may have limitations in dealing with angles and curves, such as is found in chairs, the majority of woodworking projects use rectangles and squares as a basis of construction, and are candidates for this system.
What Kind of Stick Is That?
The definition of a stick’s function that I use is:
Story Rods
Used to record particulars of a space, like a kitchen, hall, basement, etc. It is worked in pairs and has window, door, and plumbing, also electrical, gas or other considerations for a master layout located on it. At a minimum, the height and width of a wall space are sticked, but on an "L" run, the depth should be recorded also.
Story Stick
Used to record the elements called for by the story rods, such as individual cabinets. It is this variant that has detailed information of all three dimensions.
Detail Stick
Used to transfer a component of the story stick, usually for repetitious layouts such as side by side or over/under drawer bays, wainscoting panels, etc.
The Merits of Sticking
Economical
No drafting table- machine- tools- paper, or computer and software are needed; scrap wood is the medium used for representation.
Accurate
Think of it as a custom ruler that guarantees errorless measurements for a project. In fact, unskilled labor can successfully use the method even if the ability to read a tape measure is lacking.
Fast
Using a few criteria during marking will rapidly generate an informative working layout.
Flexible
The same techniques can be used to design framed or frameless cabinets, furniture, rooms of linked cabinets like kitchens, and architectural elements like wainscoting.
Efficient
It will yield a usable component cutlist that can easily be tallied for a material cost estimate.
Revealing
Helps to visualize the projects true physical appearance, since it is a 1:1 scale.
Assembly Aid
The stick can be used as a fixture or guide when assembling the project.
Record Keeping
The stick can be stored indefinitely, and if revision or reconstruction is needed, it provides exact construction detail. A collection of sticks provides a database of templates for ease and speed of future layouts.
Making and Using The Stick
Make the stick from a light colored closed grain wood like poplar, birch or pine. The length should be- at a minimum- the longest dimension of your project. In most instances this will be the horizontal dimension, but some exceptions are bookcases, armoires, and most kitchen cabinet modules, which usually run longest in the vertical. Make the width of the stick 1-1/2", and use ¾" thick stock. I use the two broad surfaces for height and width representations, and one ¾" edge for the depth, which usually does not need as much detail room as the others.
It is sometimes advantageous to divide the broad face view in two along the stick length. This is to provide a clearer representation of construction details by breaking out door and drawer fronts from the face frame and carcase renderings. They still maintain their position relative to the project, but it serves to function like an exploded view technique used in assembly drawings.
Another approach to distinguish specifics is to use colored pencils- red for fronts, green for frames, blue for drawer boxes, etc.
I usually begin with the horizontal layout, as it calls for the most design decisions. But I frequently will flip to the other two aspects as well, especially if it means staying focused on the total design of one element- like a drawer bay- and not losing my train of thought.
Also be sure to double check your points of reference. The stick is infallible, but you are not. My mistakes have simply been ones of measuring too fast and writing down what I thought was a valid dimension, only to find out later that I had added in a wall thickness- or, worse yet- undershot a critical measurement. If you can avoid both situations, you are working at 100% efficiency- you can’t possibly do better, so be pleased with yourself, and just think; it's been around a little over two thousand years just awaiting your discovery.
Bookmark This Page!
USE YOUR BROWSER'S BACK BUTTON FOR PREVIOUS SCREENS