 |
| |

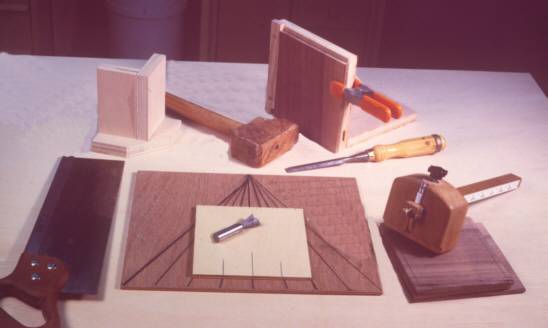
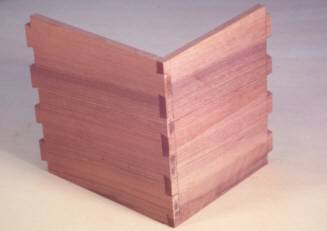
A part man, part machine technique for creating the classic woodworker's joint, this method works well for both blind and through dovetailing jobs. Using the table mounted router and a simple jig to cut the tails of this joint greatly speeds the process, and using the resulting tailboard as a template for the pins means component interchangeability not usually found with hand-cut work.
|
|
|
Layout of the tail spacing can be quickly arrived at by use of a "computer board"; simply a set of evenly spaced converging lines drawn on a piece of scrap. As shown in the image above, hold one edge of the work to the setup board so that the lines equally bisect the width at the extremes, this will form the half pins end layout when cut with the bit. Continue to pick up the centerline, and any intermediate lines desired. This step can also be done by means of measuring or using dividers as well.
Set the router bit height to the thickness of the tailboard stock.
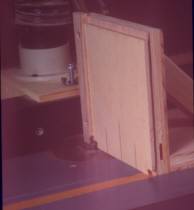 |
The jig to hold the tailboard in a vertical position while cutting the tails is very simple, just some scrap biscuited together and a vertical fence installed on the right side. A 45- degree brace also serves as a handle. Begin by setting the table's fence so that the dovetail bit is centered to the outside edge of the work piece while in the jig, this will allow the formation of a half pin joint on it's mating part. |
In fact, the bit is reset to the centers marked on the work edges as the operation progresses. Make the cut, rotate the work and cut the opposite outside edge. Shut down the router, reset the table fence to the next index and cut, rotating again to mirror the cuts on the opposite side. When the center is reached, rotate and re-cut as well. This is the secret to this methods component interchangeability; all cuts are exact mirror images.
Set the marking gauge to the work thickness, and scribe both faces of the intended pin joint, this is the depth of cut limit for the pins. The use of a fence adapted to the backsaw allows that step to be quickly accomplished, and is a handy facility to have—simply set the fence to the work thickness for a repeatable depth of cut.
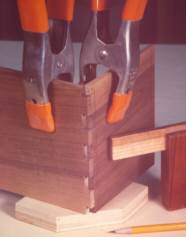 |
Place the pin board on the holding fixture, flush it to the tailboard side and spring clamp it. Lay the tailboard onto its fixture side and flush it with the outside surface of the pin board, clamping as well. With a sharp pencil, mark the angles from the tails onto the end of the pin board. Note that if this were to be a blind dovetail construction, the tailboard end would be less than flush. |
 |
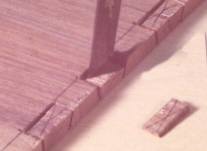
Carry the ends of these lines down on both sides to the gauge line with a small square. As your skill progresses, this step can be omitted as long as you can cut a good vertical line. The close-up shot shows what the end result should look like; note that the "X" is in fact put on the wrong area. |
Traditionally it denotes the stock to remove and so should be used in that manner—here it is used to identify the intended part result.
Hold the pin board vertically in a bench vise, and with the chisel, make a pressing vertical cut downwards following the layout line's angle across the board end. Come in at an angle from the waste side to produce a "V" chip for the saw's teeth to lock into. Doing this to all the cuts for the pin board significantly increases accuracy as the saw won't jump around at the beginning of the cut. Ensure the resulting bevel is facing the waste area for the most accurate incise; again, a straight edge vertical cut is desired for the scribe line. Now cut down to the gauge line with the back saw on all work pieces. It may be helpful to setup a small mirror so as to see if the cuts on the backside are running straight as well.
 |
A sharp chisel is a must, both for speed and accuracy in removing the waste between the pins. Holding it at a slight inward angle, tap it down along the stop line marked in a previous step, and then come at it again horizontally so as to "pop" out the chip. |
Continue for all waste-cuts on one side, flip and repeat on the other side. Continue to flip and repeat until finished wasting the stock; this method is faster than using a coping saw, and the end result will be a shoulder cut that tapers inward slightly, aiding final assembly, and producing a clean joint line.
Test fit the joint, but be prepared for a good fit the first time, with little rework needed for this technique.
Bookmark This Page!
| Top |
So tell me, |
USE YOUR BROWSER'S BACK BUTTON FOR PREVIOUS SCREENS
Add A Fence to A Saw
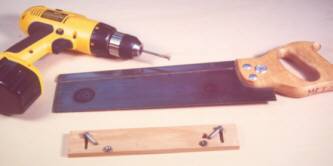
To drill through a typical backsaw's hardened steel blade, first soften a strategic area of steel, known as annealing, by introducing heat. Here we can use what otherwise is a disastrous consequence to our advantage; by spinning a nail and placing the head where we want to bore the hole, friction builds heat up immediately in that locale, thus drawing (destroying) the temper. Now we can easily drill through for our fence screws by using a machinist's drill bit. As shown, the fence has a pair of slots to facilitate the depth range desired, from just a scratch to?